Set Up Apple Wallet
This page explains how to configure Apple Wallet so customers can add their Customer barcode/QR code (based on their store customer ID) to Apple Wallet.
By enabling Apple Wallet, customers can display their Customer barcode/QR code directly in the Apple Wallet app. This removes the need to log in to their account page just to show a code and provides a smoother checkout experience.
Prerequisites
Using this feature requires registration in the Apple Developer Program.
The following are required to complete registration:
- Apple ID with two-factor authentication enabled
- D-U-N-S® number (required when applying as a company)
For more details, please refer to Apple's documentation: Program Enrollment
⚠️ Apple Developer Program registration requires an annual fee (USD 99+).
Supported Themes
Apple Wallet can be used with:
- Customer accounts — Recommended (new customer accounts)
- Customer accounts (legacy) on OS 2.0 compatible themes
Apple Wallet cannot be used with:
- Legacy customer account pages on themes that are not OS 2.0 compatible
Apple Wallet Setup – Common Steps
Open the Apple Wallet tab in the Barcodeator app.
1. Fill in fields and upload images
- Card Title
- Barcode Type (QR code or CODE128)
- Images (logo, icon, main image) × 3 sizes
Configure each field as needed. A preview on the right side of the page will show how your settings will appear in Apple Wallet.
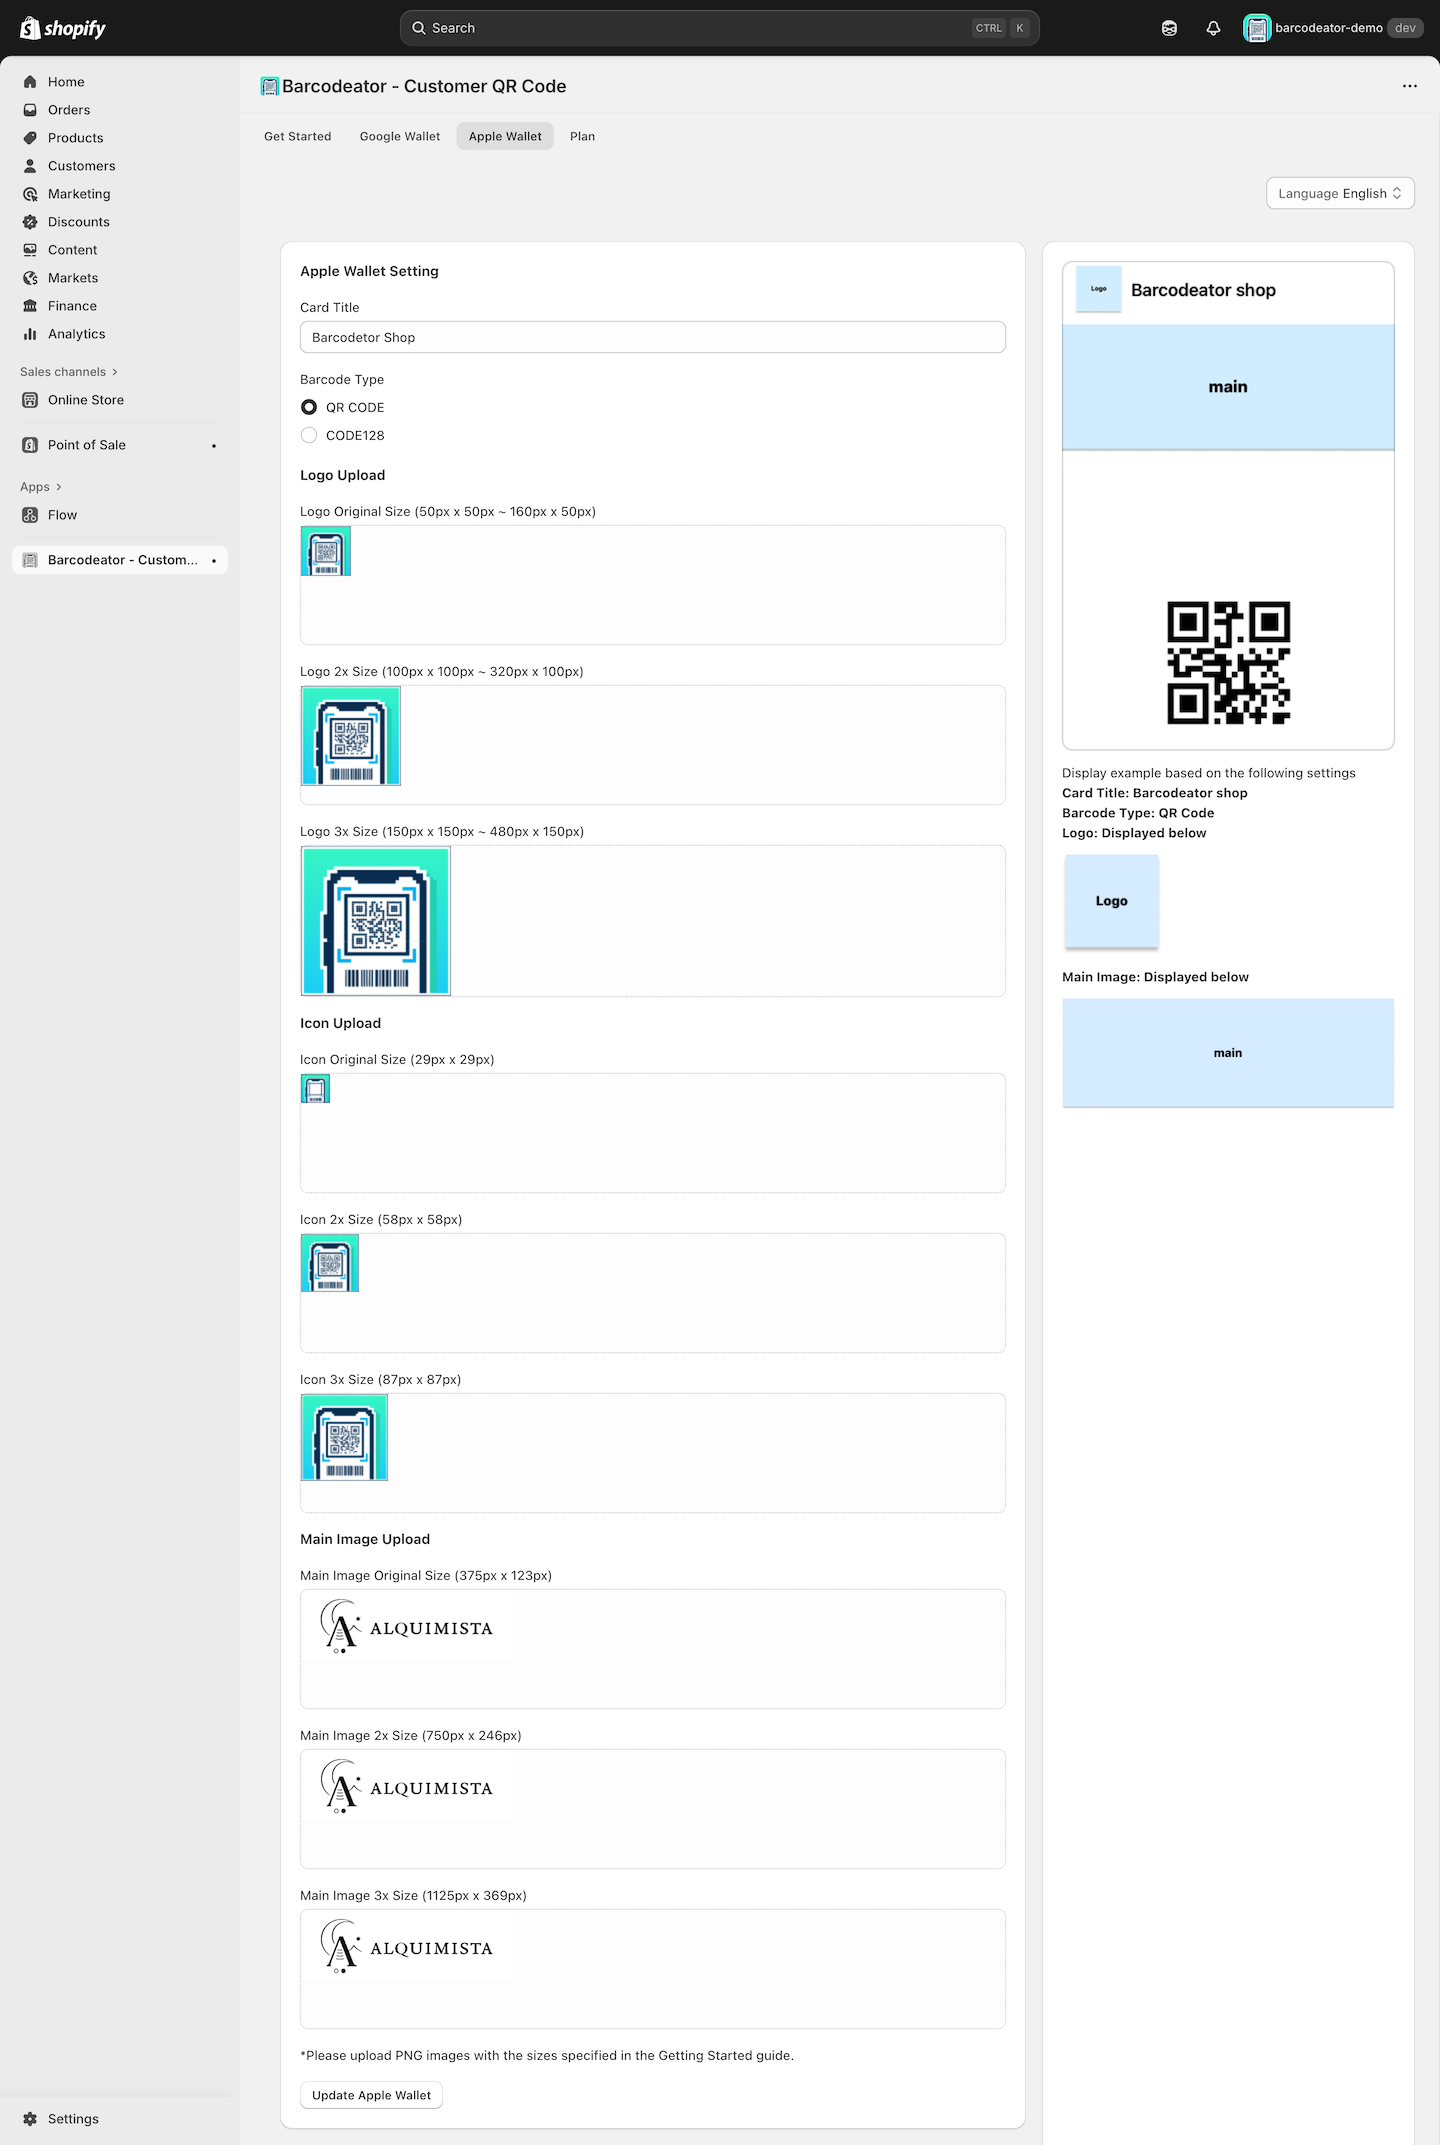
After uploading the images, click Save Apple Wallet to save the images.
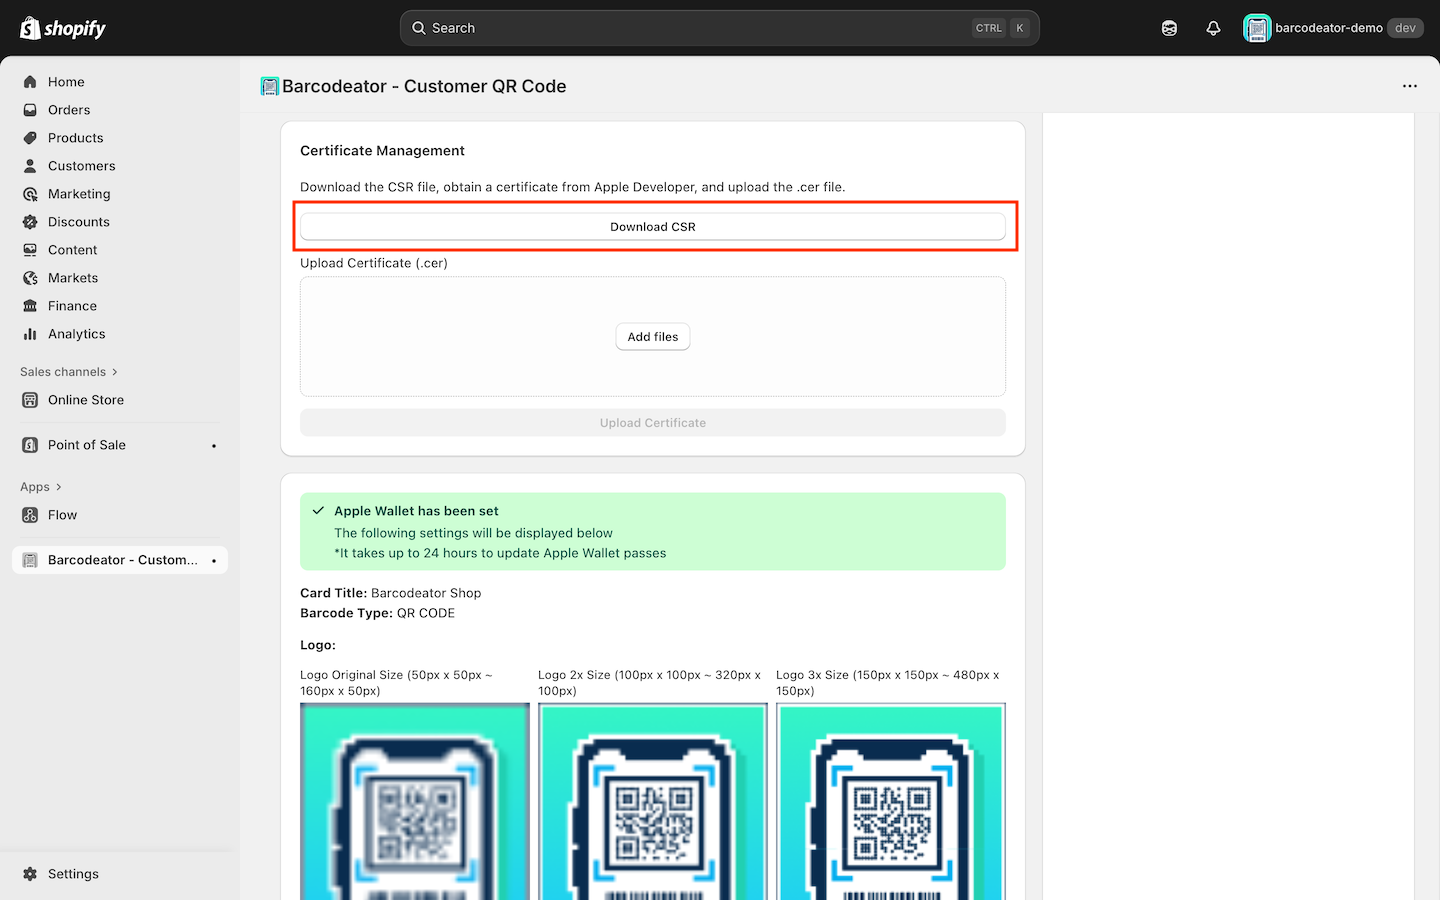
2. Download the CSR file (Certificate Signing Request)
Once images are uploaded, you can download the CSR file, which is required to issue an Apple Wallet certificate.
This CSR file will be used in the Apple Developer portal to generate the pass certificate.
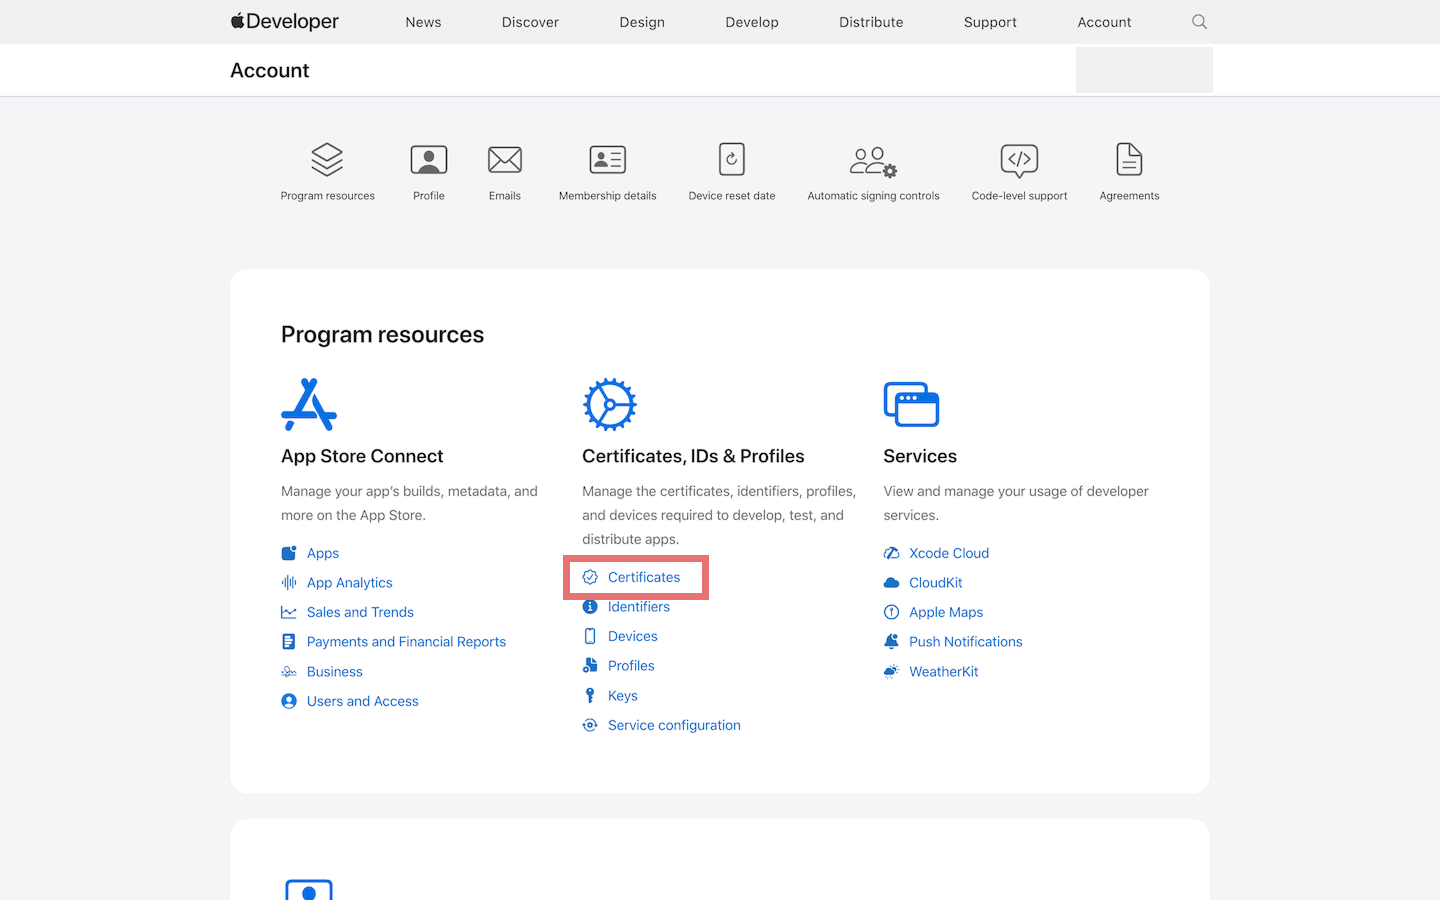
Issue a Certificate (pass.cer) in Apple Developer
Follow these steps in your Apple Developer account dashboard.
1. Log in to Apple Developer
Click on Certificates.
2. Open Identifiers and register a new Identifier
Click the + button next to Identifiers.
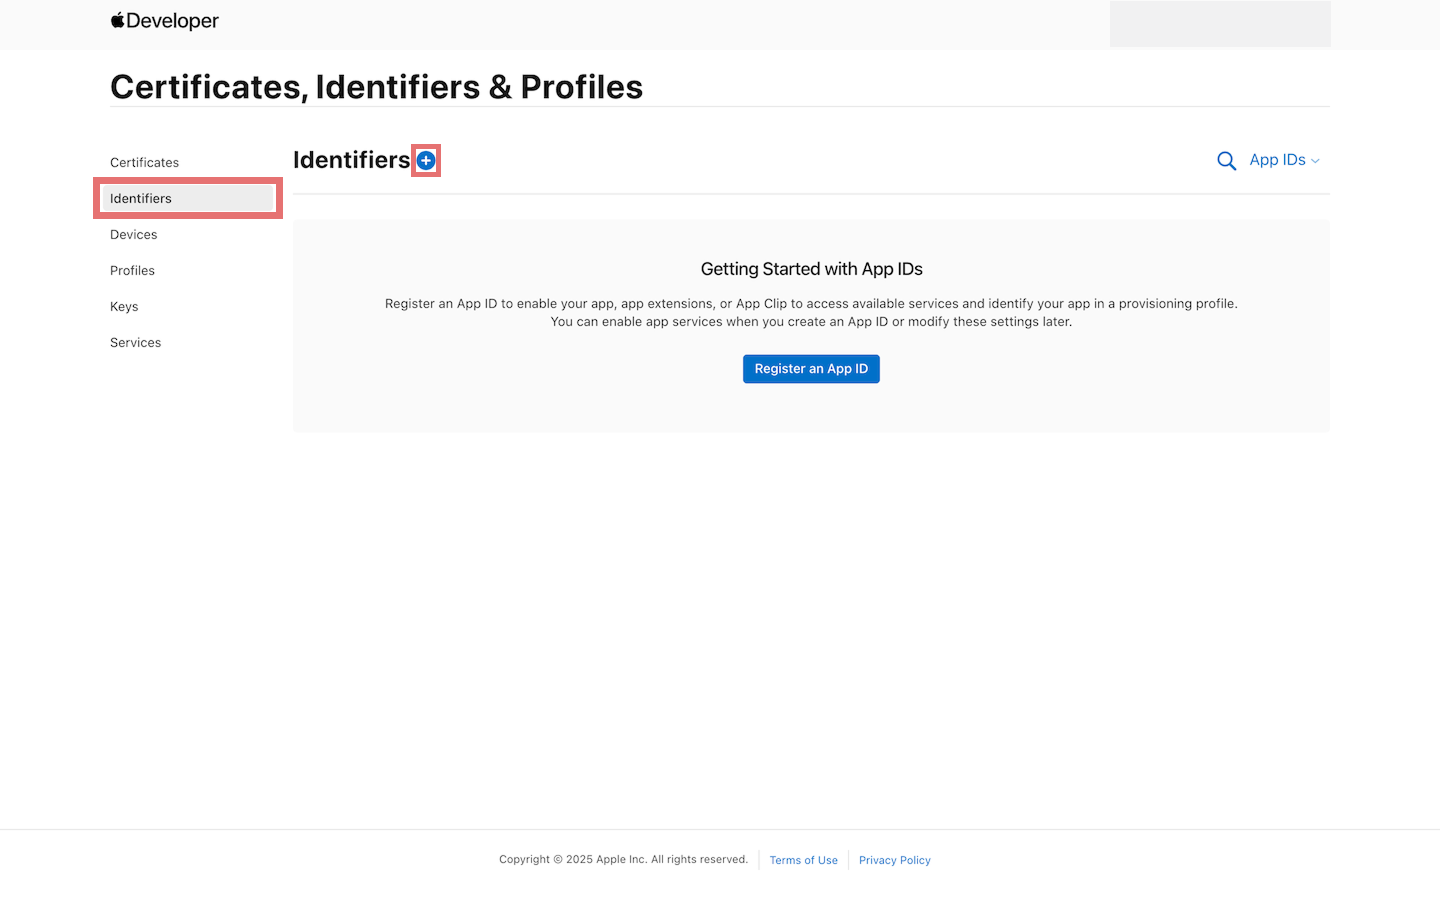
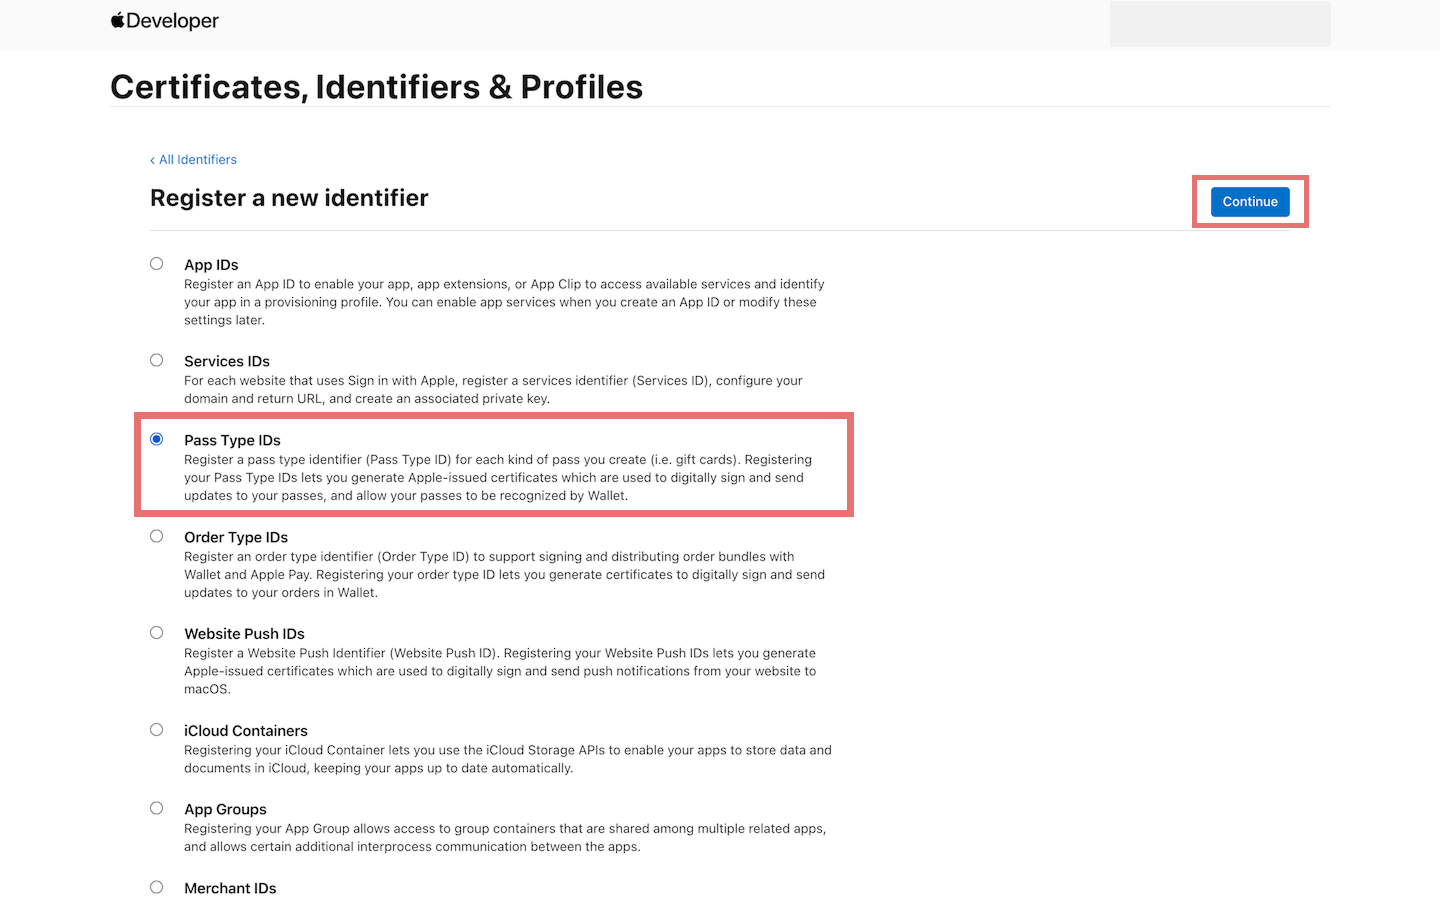
3. Select Pass Type ID
Choose Pass Type IDs and click Continue.
Enter appropriate information for Description and Identifier.
We recommend using:
- Description:
Store Name Pass Type ID - Identifier:
pass.com.myshopify.storename
This makes it easy to identify later.
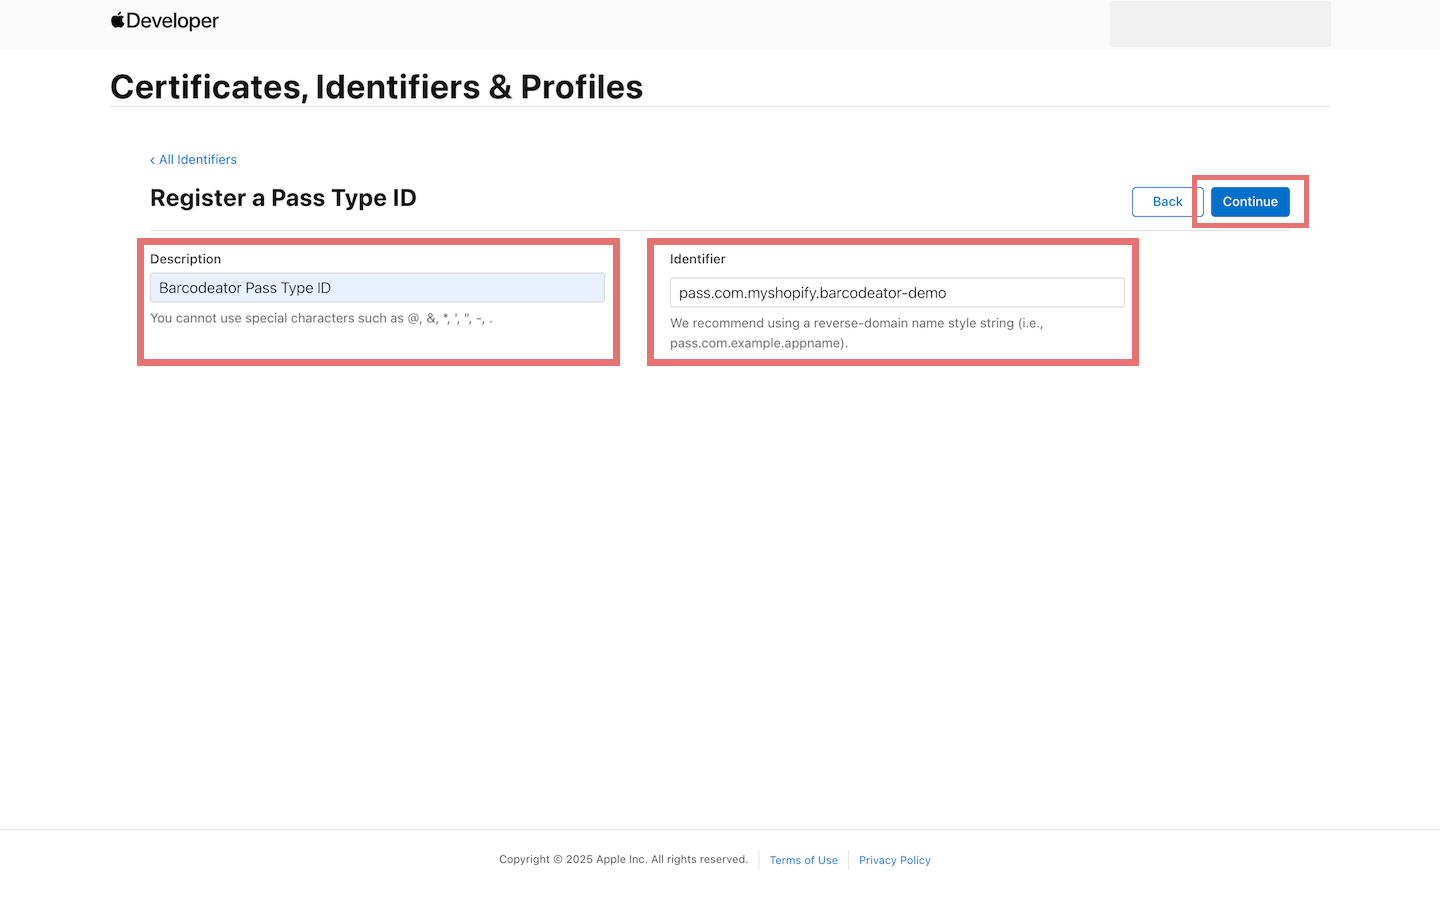
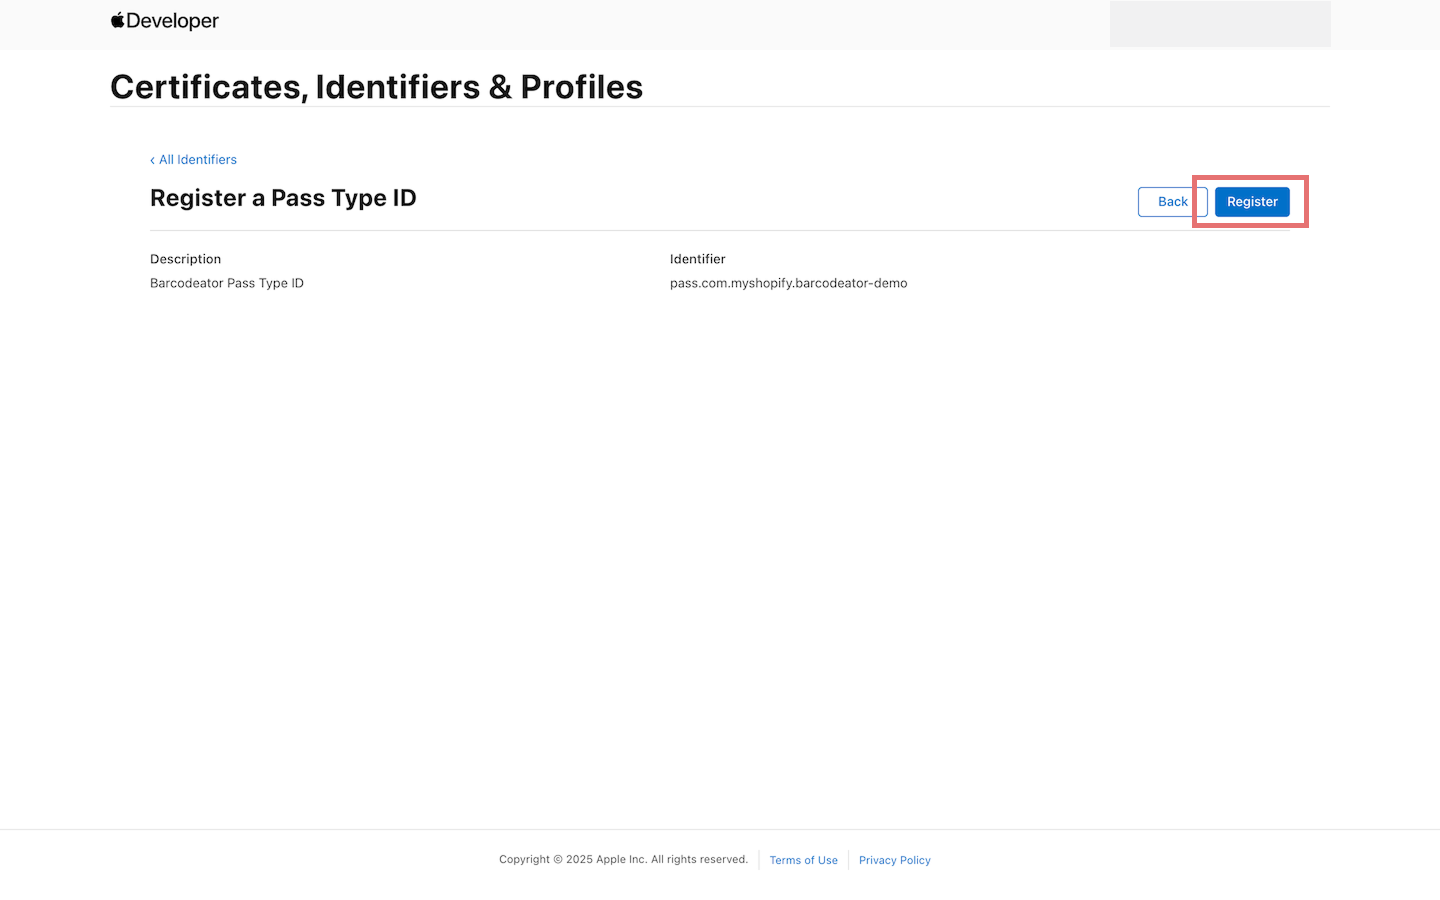
Click Register to complete creation.
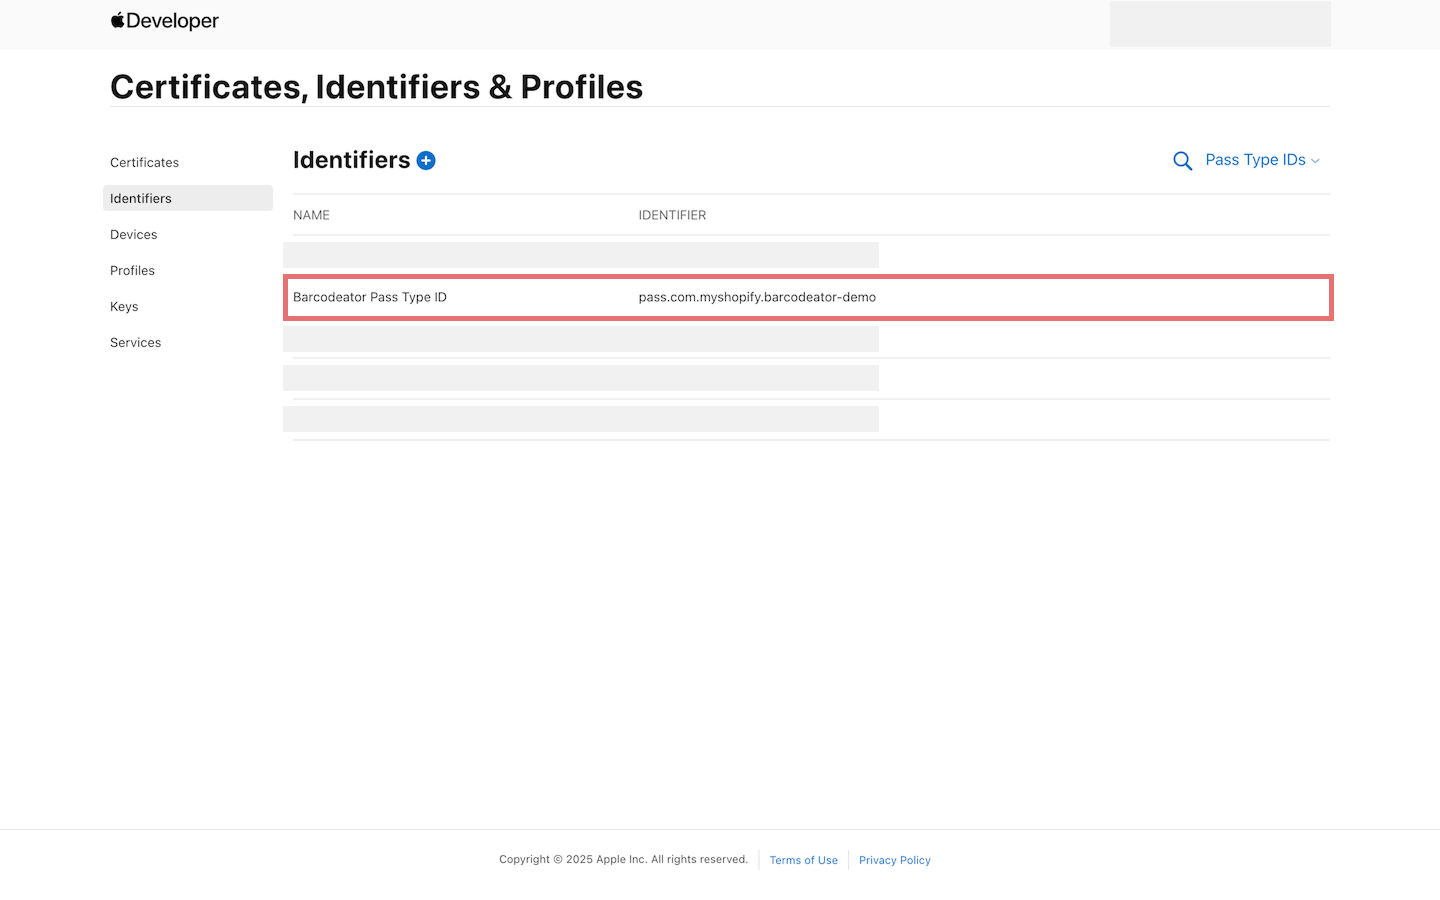
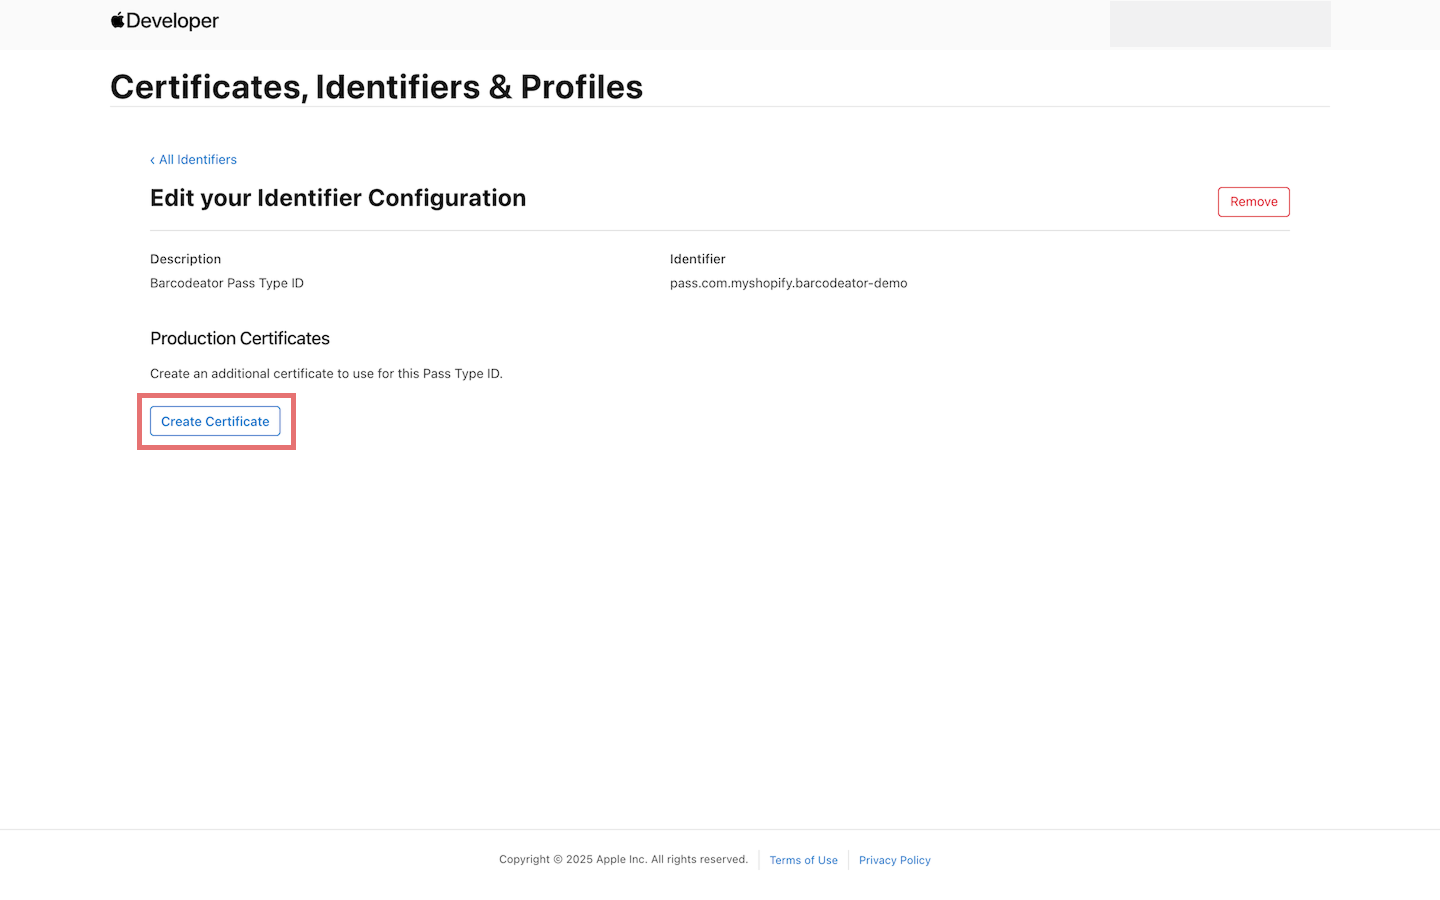
4. Open the created Pass Type ID from the Identifiers list
Find the Pass Type ID you created and click to open its details.
5. Create Certificate
Click Create Certificate.
Click Choose File, and upload the CSR file downloaded from the Barcodeator app.
※ The field “Enter your Pass certificate name” can be left blank.
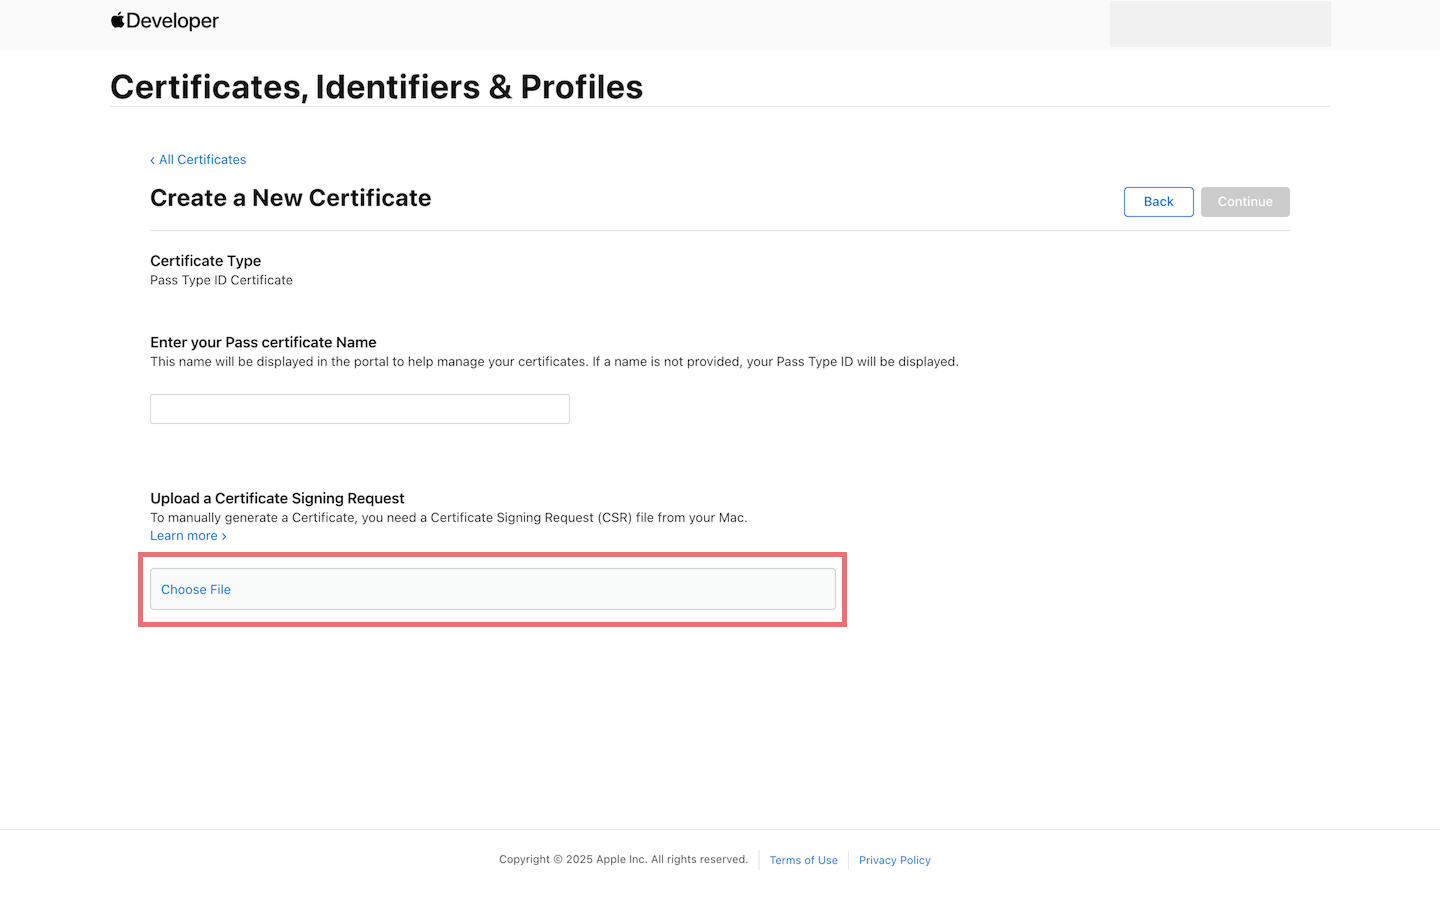
Once uploaded, the Continue button will become clickable.
Click Continue to complete registration.
6. Download Certificate (pass.cer)
After processing, Apple will generate the pass.cer file.
Click Download and save the certificate to your computer.
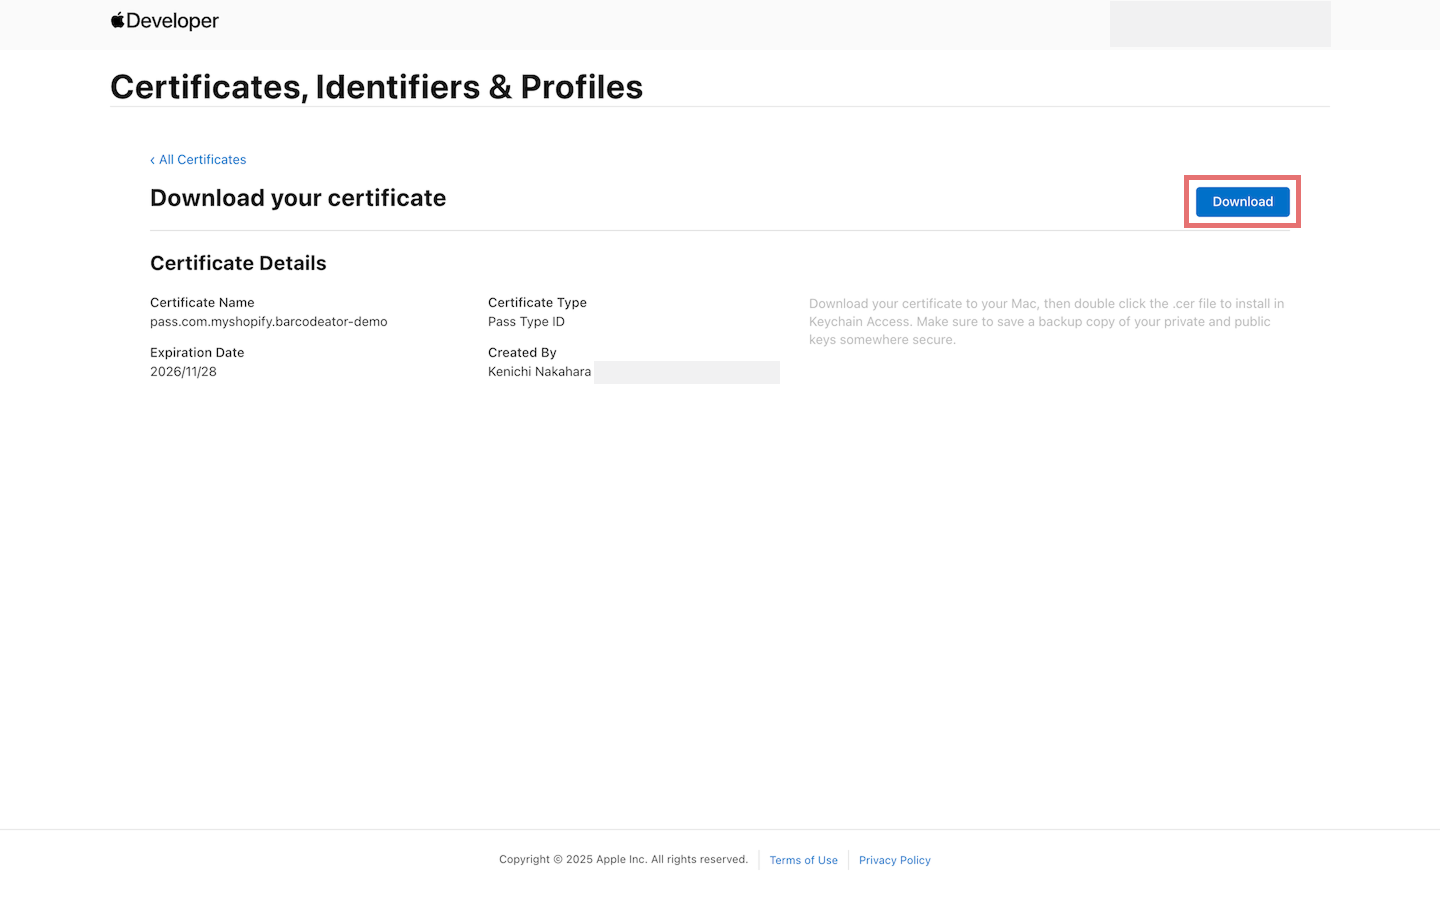
This completes all required steps in the Apple Developer portal.
Upload pass.cer to Barcodeator
Return to Barcodeator and upload the pass.cer file.
Click the certificate upload area or drag & drop the pass.cer file into it.
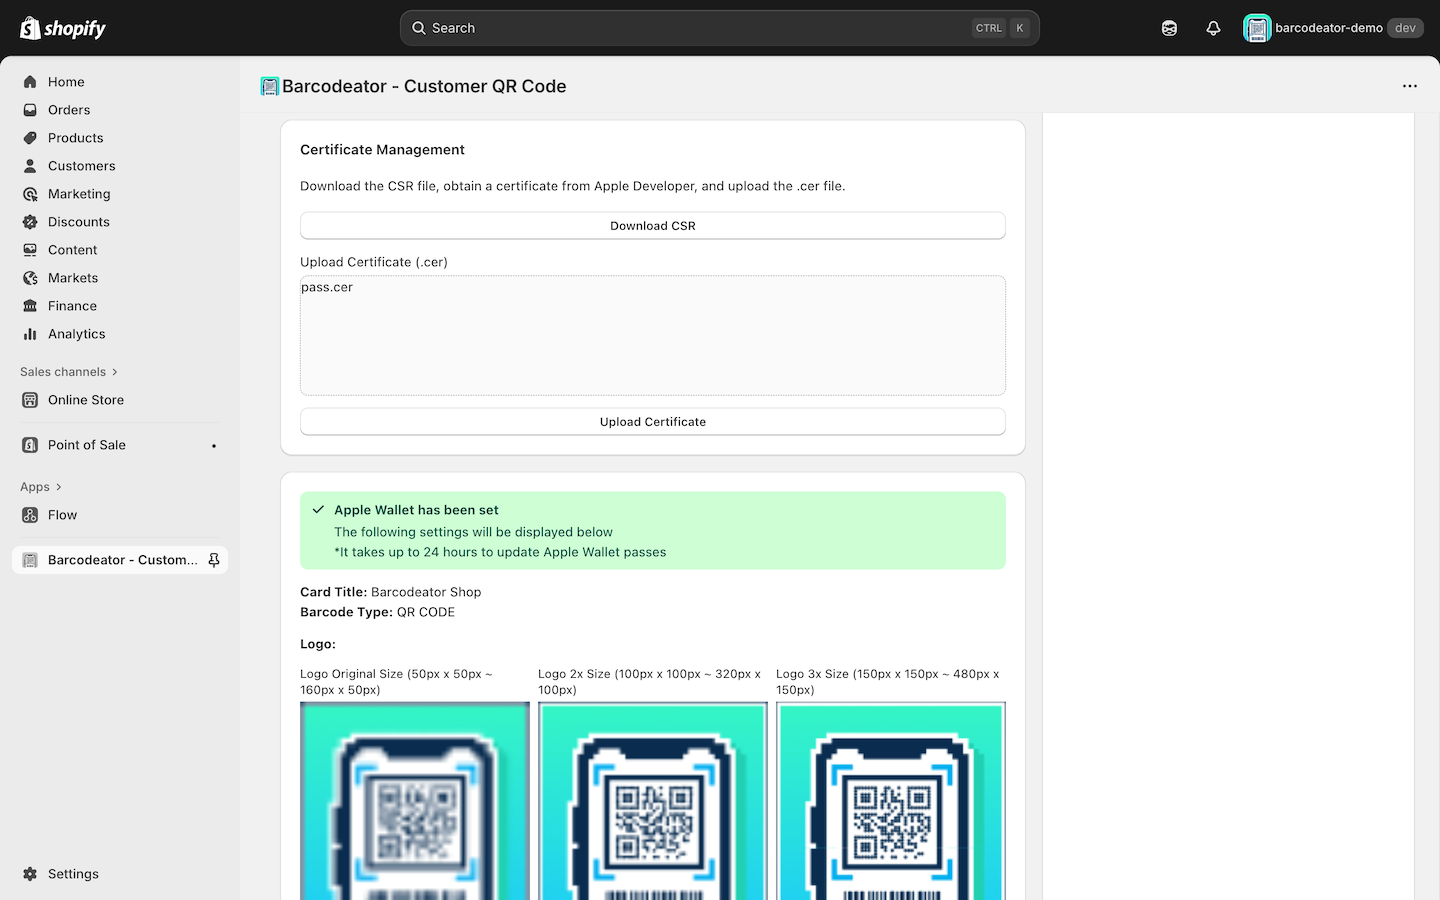
Once uploaded successfully, the screen will show confirmation like this:
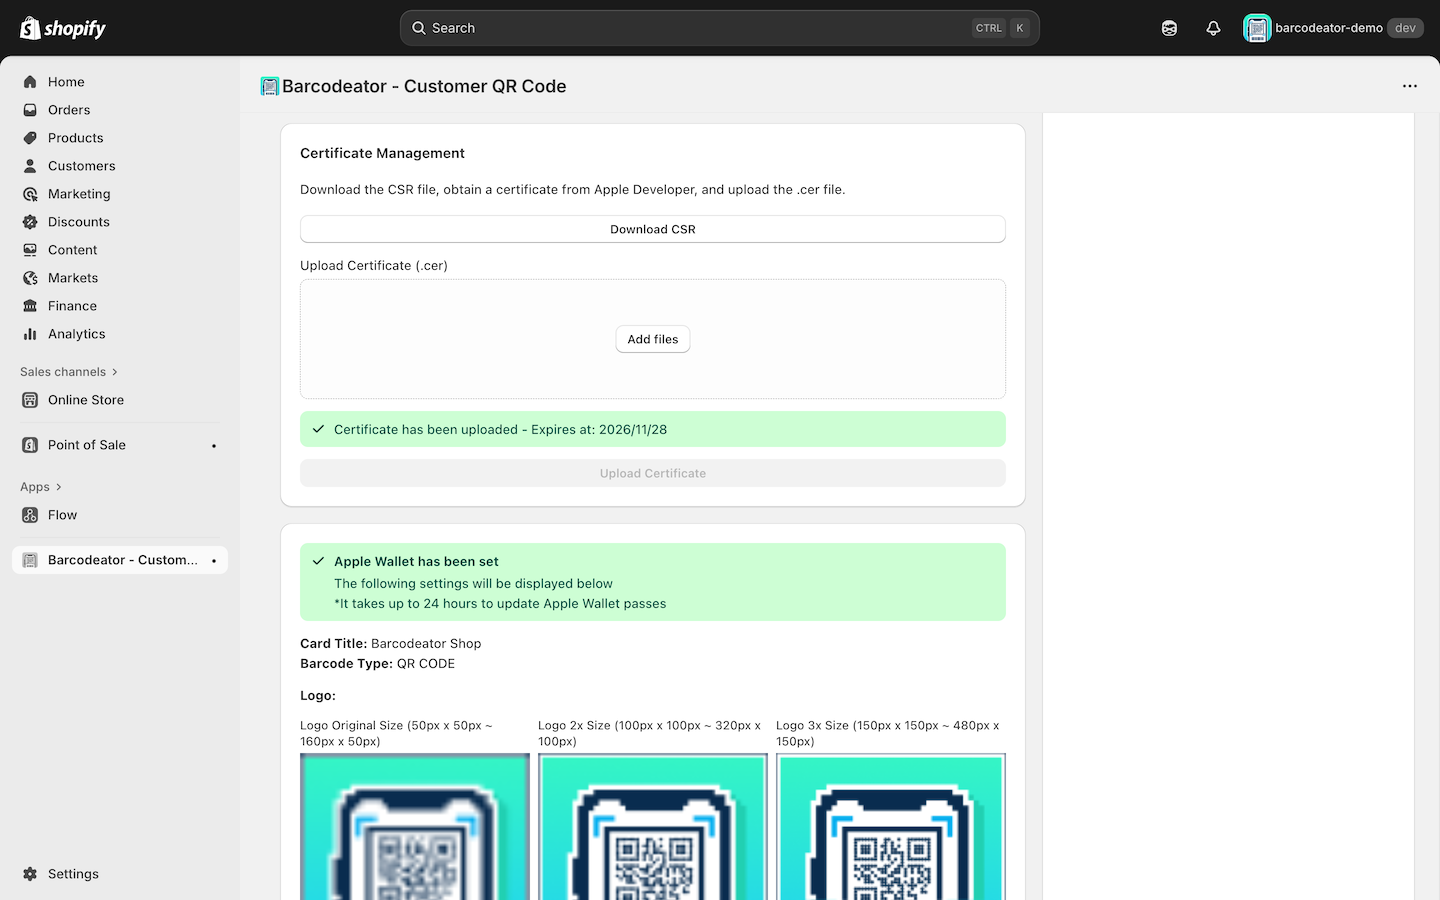
⚠️ Your certificate is valid for 1 year from the date of issuance. Annual renewal is required.
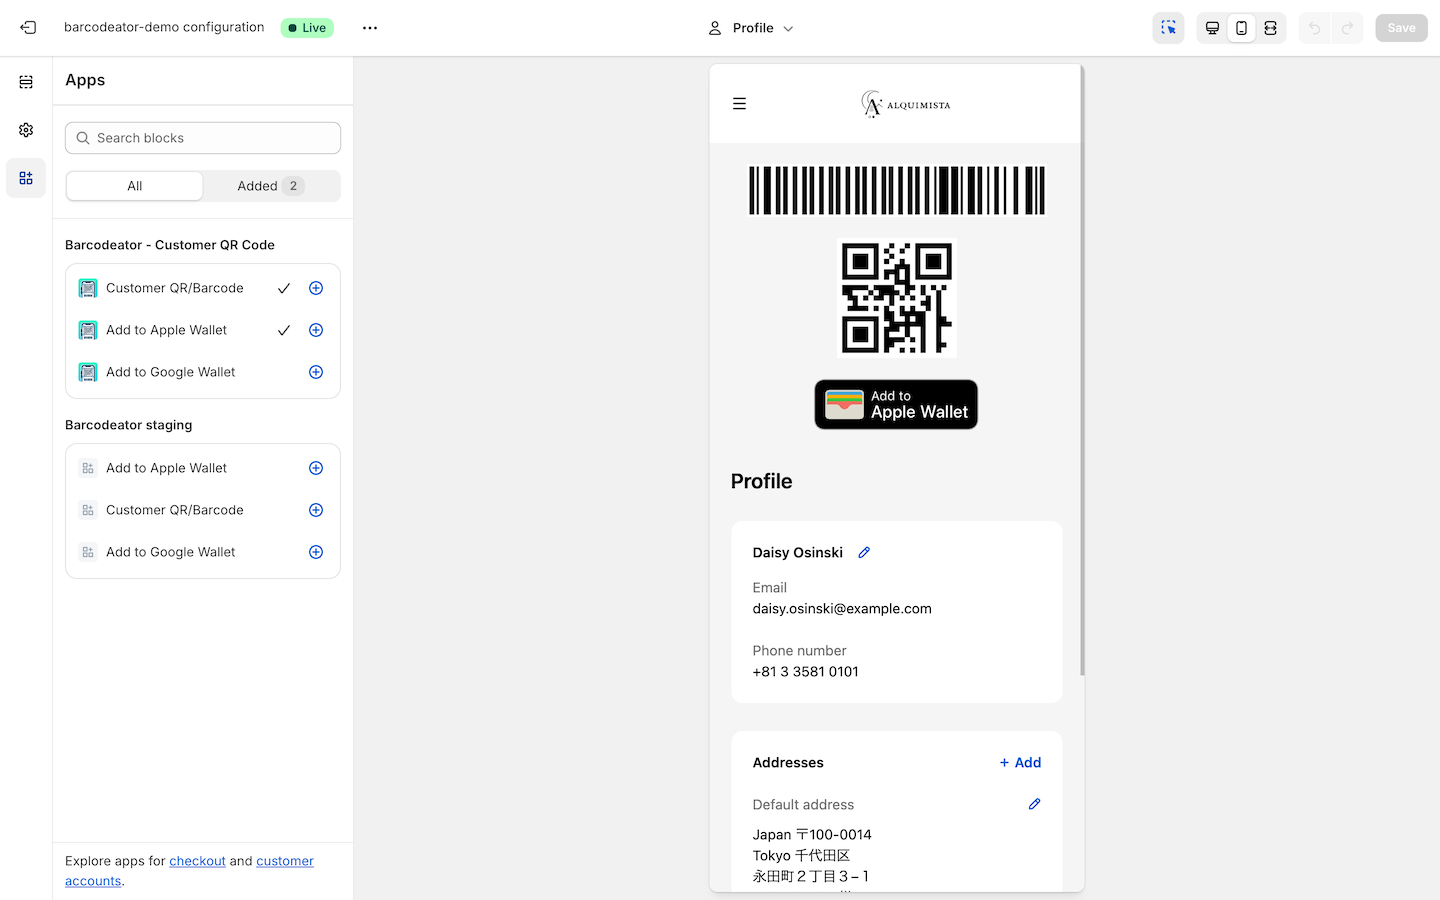
Add Apple Wallet to Your Store (Customer Account Page)
Customer accounts — Recommended
Apple Wallet can be displayed as an app block on the profile page.
You can open the editor from:
- Barcodeator app → "Edit profile page"
or - Shopify Admin → Settings → Checkout → Customize
In the left sidebar, choose Apps → Add to Apple Wallet, then select Profile as the placement.
Legacy customer accounts (OS 2.0 compatible theme)
Go to:
- Shopify Admin → Sales channels → Online Store → Themes → Customize
Then add a section:
Add section → Apps → Add to Apple Wallet
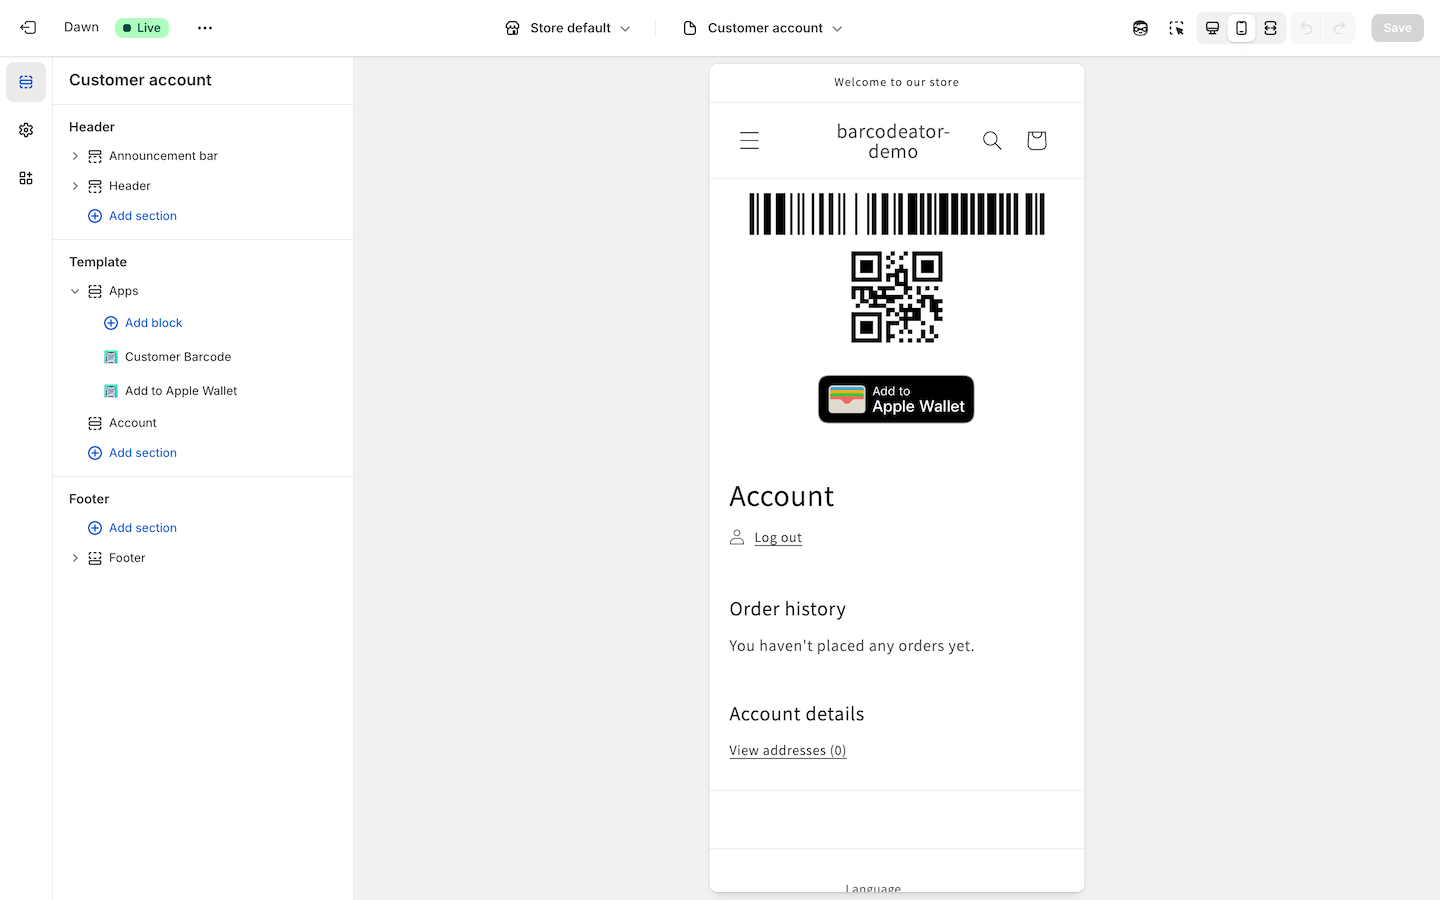
⚠️ In the theme editor, dummy data is displayed.
Always test using an actual iPhone logged in to a customer account.
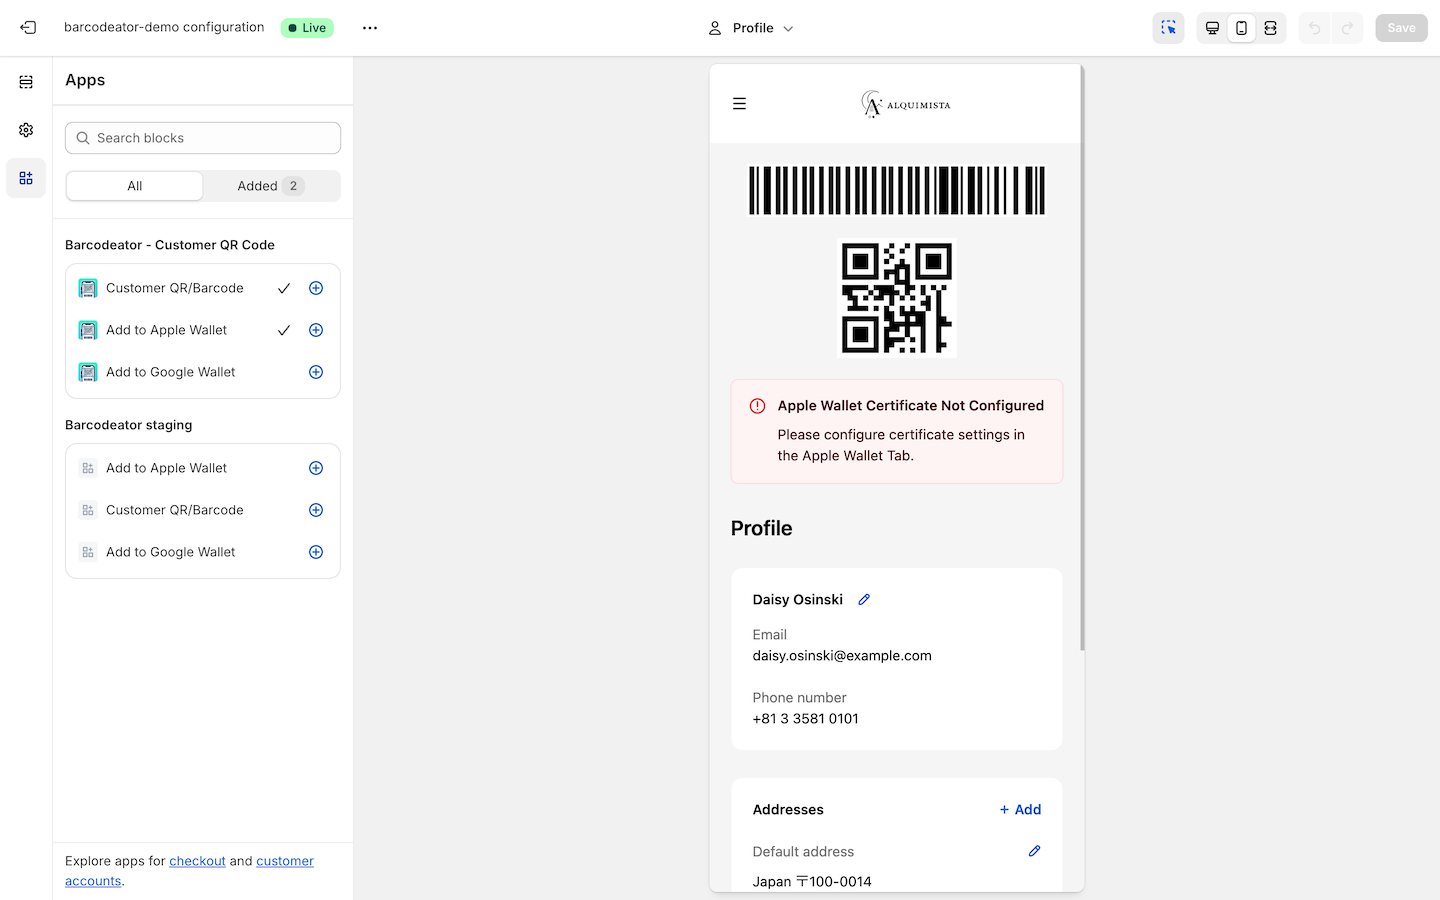
Errors When Apple Wallet Is Not Fully Configured
If Apple Wallet has not been configured correctly, you may see the following warning when adding the app block.
Example – Customer accounts (Recommended)
Example – Legacy customer accounts

⚠️ If an error appears, please review all steps in Apple Wallet Setup – Common Steps (images, CSR download, certificate upload).
You have now completed Apple Wallet setup.
Next, proceed to: Using Barcodeator with Shopify POS